How to create a bibliography using Overleaf and Paperpile — a step-by-step guide
Suzanne and Stefan · May 31, 2022Guest blog post by Suzanne O'Regan and Stefan Washietl from Paperpile, a cloud-based reference manager.
Wondering how to quickly create a bibliography for an Overleaf project? Try Paperpile.
Paperpile is a cloud-based reference manager that allows you to find, collect, and organize your papers right in your browser. Paperpile can generate, import, and export BibTeX (.bib) files.
Paperpile’s new Overleaf integration simplifies the writing workflow for Overleaf and Paperpile users. This highly requested feature, from users of both platforms, allows you to link reference libraries, folders, and labels in Paperpile with Overleaf projects.
We’re going to show you how to create a bibliography in 3 quick and easy steps so you can benefit from having:
A one-time setup process. Set up Paperpile’s Overleaf integration workflow in 3 steps, and forget about it.
A BibTeX file in your Overleaf project that is synchronized with your Paperpile library. Add new references or update existing references in Paperpile without having to manually generate or export the BibTeX file each time.
Many options to customize the format of your BibTeX file and the metadata that’s included.
These steps work for all Overleaf users, including those with a free plan. Overleaf users can try Paperpile for 30 days free. After the 30 day free trial, Overleaf users can purchase a personal subscription for Paperpile or buy a multi-user license for their group.
Step 1: Collect and organize your references in Paperpile.
Add references to your Paperpile library using the Google Chrome extension, then organize your library using folders and labels.

Pro tip: Writing a paper? Save all your references for the project into a folder in Paperpile, and link the folder to your Overleaf project.
Ready to add references to your Overleaf project? The next two steps show you how.
Step 2: Set up the Overleaf Integration Workflow in Paperpile.
- Go to Workflows and Integrations in Paperpile.

- Under Overleaf integration, click the Add button.

- Select the references you want to add to your Overleaf project. You can choose specific folders, labels, or your whole library.

Click Finish. This creates a live BibTeX link, which you will include in your Overleaf project.
Click Copy to copy the link that you will use in Step 3.

Step 3: Go to your Overleaf project and add the link from Paperpile.
- Click the New File icon in your Overleaf project.

Select from External URL.
Paste the Paperpile link into the URL to fetch the file from field.

Choose a name for your BibTeX file, e.g.,
references.bib.Click Create.
Include the BibTeX file in your LaTeX document using
\bibliography{references}.
Paperpile and Overleaf synchronization
As a research project progresses, it is typical to have to include new references and to update existing ones. Paperpile’s Overleaf integration allows you to complete these tasks easily.
To add a new reference to your project, use these steps:
Add the reference to the Paperpile folder, label, or library that you have linked to your Overleaf project.
Go to the
.bibfile in your Overleaf project. At the top of the screen, you will see the live BibTeX link and the Refresh button.

- Click the Refresh button. The BibTeX entry will be automatically created in the BibTeX file.
The same steps apply if you wish to update an existing reference in Paperpile. Simply edit the reference, and then refresh the live BibTeX link using steps 2 and 3.
Tips for Using Overleaf with Paperpile
You can customize how you want Paperpile to export your BibTeX files in Settings > BibTeX. Note that having abstracts included in the exported
.bibfile can sometimes lead to TeX parsing errors in Overleaf, so we recommend deselecting that option in Paperpile: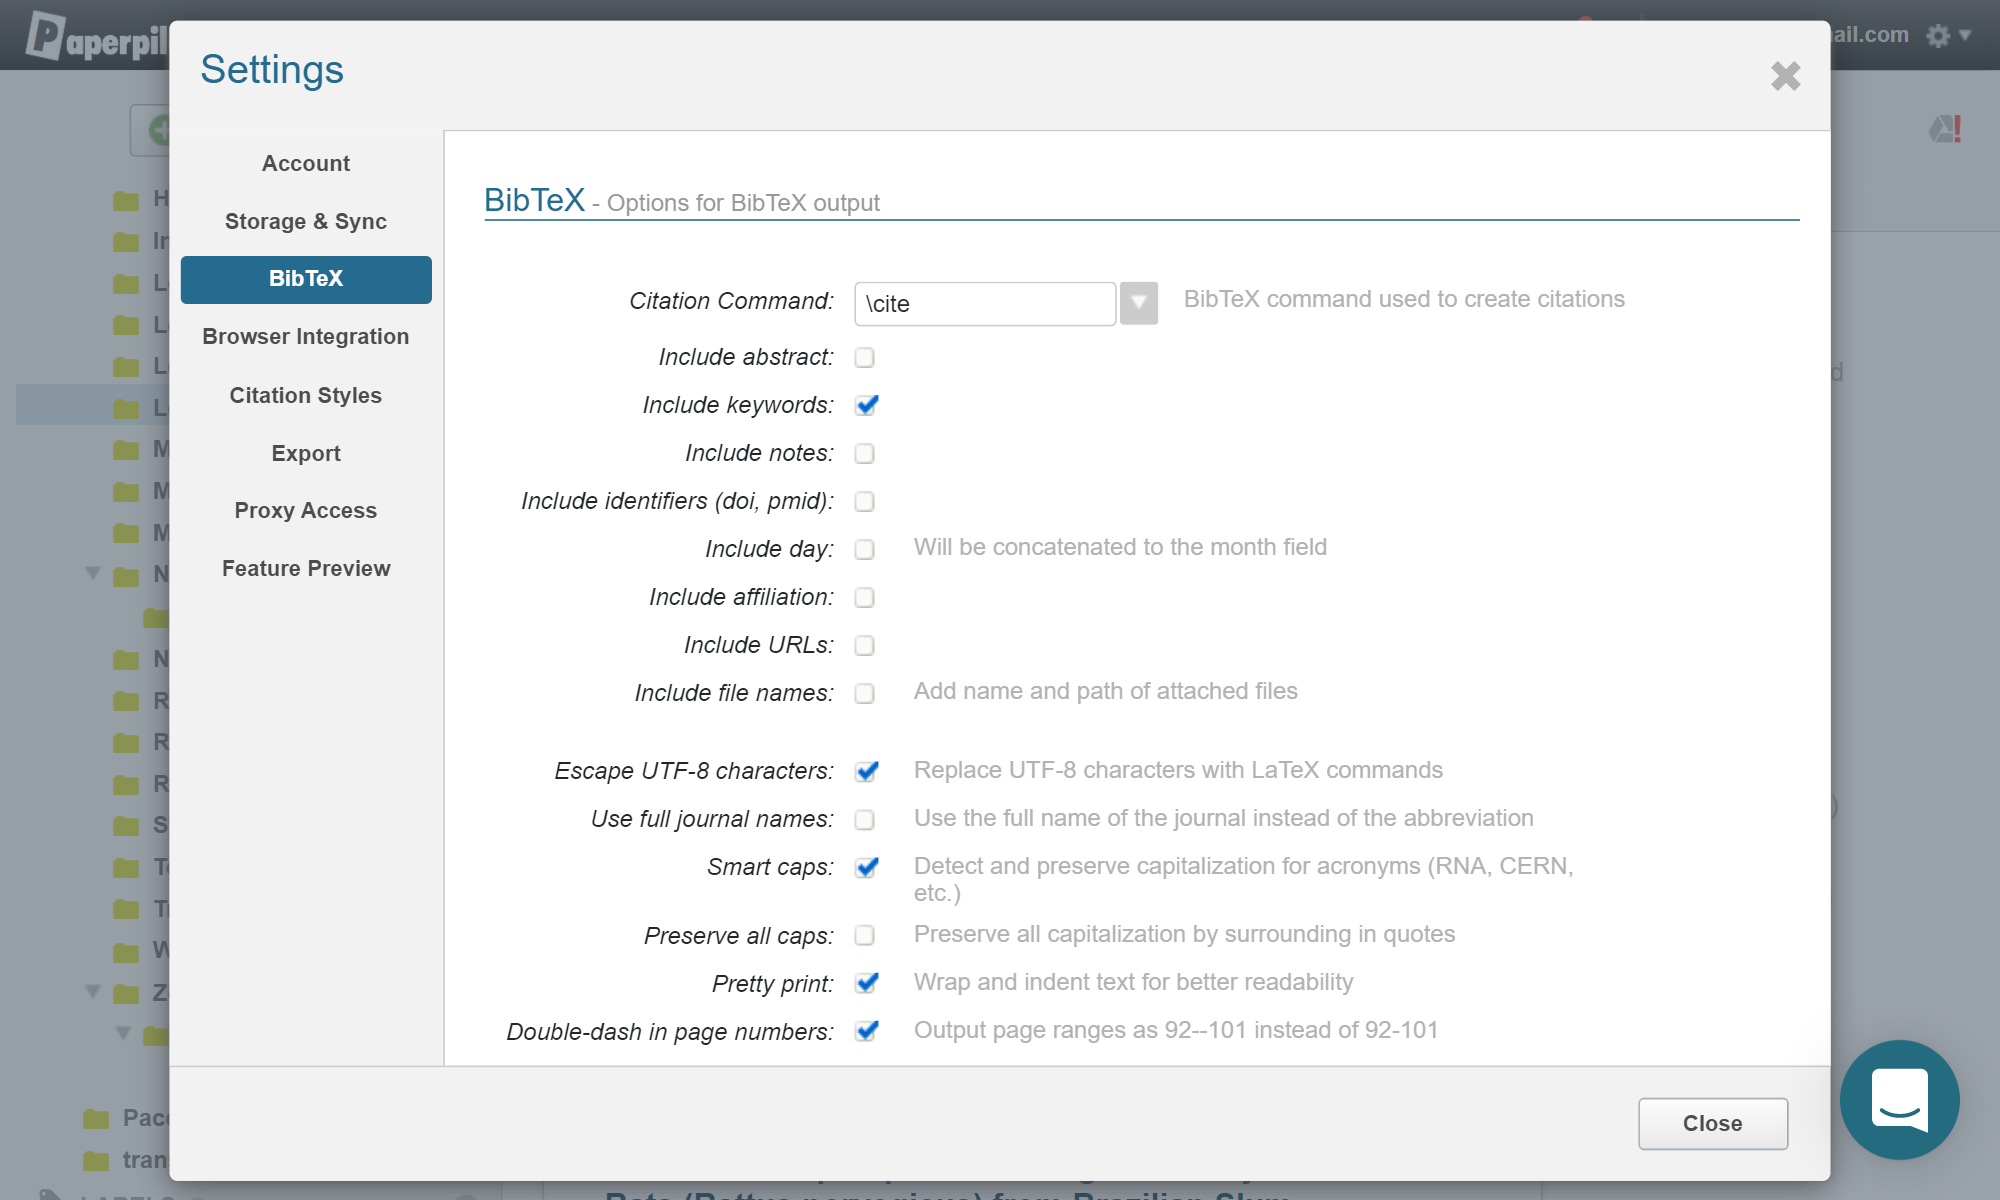
You can include the Paperpile generated BibTeX file in addition to existing BibTeX files in your project. Simply include multiple BibTeX files in your LaTeX document as
\bibliography{references, other-references}.If you already have a BibTeX file in your Overleaf project, you can easily transfer it to Paperpile. Download your Overleaf project files to your computer as a
.zipfile and import the.bibfile to Paperpile as a folder: Choose Add papers > Upload files > Choose file(s).You can also use Paperpile to manually export a
.bibfile and import it to any Overleaf project. Go to the Paperpile sidebar, select the folder, label, or shared folder that you wish to export, and choose Export > BibTeX. Then import it to Overleaf using the Upload files button.Paperpile will be able to generate
.bibfiles compatible with BibLaTeX and UTF-8 support in an upcoming version later this year.

Congratulations, you are now ready to use Paperpile with Overleaf! We hope that using both platforms together will make your research workflow more efficient.